B9#11 guitar chord
- Tap a note to hear it
- Arrows change position
- Fingers, notes or intervals
- Play the chord
About B9#11 — shell voicings
B9#11 answers a naming puzzle: sounds like a flat fifth, yet the natural fifth remains present. The notes are B, D#, F#, A, C# and E#.
The symbol therefore describes an added raised fourth above , not a fifth that has been replaced. A voicing should make that distinction audible.
Over a major 7th instead of the flat 7th, and with no 5th, the same sharp 11th gives .
Also written B9(#11), B9+11 or B9♯11.
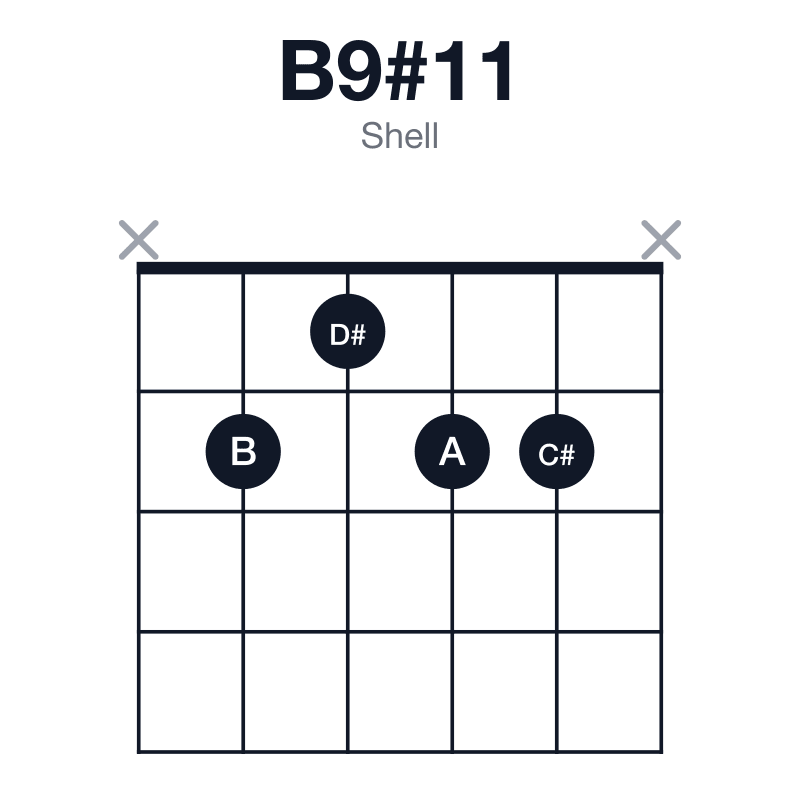
What is a shell voicing
Root, 3rd and 7th. The 3rd and 7th set the quality; the 5th adds nothing, so it goes. That frees a string for a tension.
How to use B9#11
B9#11 is a dominant with its tension raised, so it still points at — harder than a plain seventh does. A plain dominant has two voices a semitone from home; an altered one has four, because every altered tone is also sitting a semitone from a note of E. More voices leaning the same way is all "more tension" means here.
In a phrase:→→
The ii–V–I of E.
Voice by voice, B9#11 → . 3 voices move by a semitone, and one note is common to both chords. Those semitones are what the ear follows; the rest is the chord rearranging itself underneath.
| In B9#11 | Moves | In E |
|---|---|---|
| B, the root | stays where it is | B, the fifth |
| D#, the major third | rises a semitone | E, the root |
| F#, the fifth | falls a whole tone | E, the root |
| A, the flat seventh | falls a semitone | G#, the major third |
| C#, the ninth | falls a whole tone | B, the fifth |
| E#, the sharp eleventh | falls a semitone | E, the root |
What to play over B9#11
Useful scales
- +G#
Adds thirteenth, for a dominant sharp-eleventh color.
Chords near B9#11
Change one note
The common shapes and the derived voicings come from different places, and both are explained in how this site is built.